


How to DIY install a USB outlet
DrawBuildPlay USB Outlets are great for keeping your outlets free while you are charging your phones and tablets. Read our easy how to guide on how to install a USB outlet yourself in less than 10 minutes.USB Outlets is really a must have in any home these days. With all of our devices - from iPhones and Androids, to iPads and other tablets, it seems like we are always charging something.
But, when we are charging, I hate having that charging brick sticking out of the wall all the time. I am also always hunting around for a wire, or free outlet in a convenient spot so that I can charge.
This is where USB outlets come in.
USB outlets work just like a normal outlet, except they will have one or two ports on them that support USB. You can then just plug in your USB charging cable and charge away.
Fast Charging vs Slow Charging
Now, before you go out and buy your USB outlet, there are a couple of important things to note.
Not all USB outlets are the same.
You may recall from charging your iPhone that the smaller iPhone power adapter charges much slower than the bigger iPad power adapter.
The important difference to note between the two power adapters is the 5W and 12W charging rates. The 12W is what makes your device charge faster than the 5W adapter. The same goes for when you buy your USB Outlet. Check the wattage output on the USB ports. You will want to get the fast charger if you are installing the USB outlet in your kitchen or living areas so you can get that quick charge. If you are installing the USB outlet in your bedroom for overnight charging, then the slower charger is okay.
USB vs USB-C
The second decision you need to make is what kind of charging cable your device uses. Today, most devices still use USB chargers. But, devices are starting to move towards a new standard called “USB-C” which is similar to the lightning cable port on your iPhone or iPad. It allows for faster charging rates. Many of the new Wireless Charging Pads also support USB-C for faster charge rates.
How to install a USB Outlet
In this post, I am going to focus on installing a traditional USB outlet. A USB-C outlet can be installed the same way, but honestly hasn’t hit the mainstream yet.
How to install a USB Outlet
- Start by locating the existing outlet you want to replace. This should be a location where you can rest your iPhone or iPad while it charges, and is convenient to get to. We installed ours in the kitchen next to one of the counter tops where we usually keep our phones.
- Turn off the power at the fuse box so that you don’t get electrocuted. Check the power is off by plugging something in to the outlet to make sure it is actually off.
- Unscrew the outlet cover plate from the wall with a screwdriver.
- The outlet will be screwed into the wall box. Unscrew those.
- Carefully pull the outlet away from the wall. You will see it is connected by 3 wires. One will be the GROUND wire (this is often copper). There will be another two wires RED and BLACK which carry the power. Its a good idea to take a photo of this arrangement.
- Using a screwdriver, loosen the screws at the back of the outlet where the wires are inserted. If your outlet doesn’t use screws, there might be a latch you need to shove your screwdriver into to let the wires release.
- Follow the instructions your new USB outlet to connect these wires. It should be similar to what you just disconnected, and is probably labelled with which color wires go where.
- Push the new USB outlet back into the wall, and screw it into the wall box. Install the outlet faceplate that for your new USB outlet.
- Flip the power back on at the fuse box, and test your outlet is now working. If all looks good, then try to charge your phone using your new USB outlet.
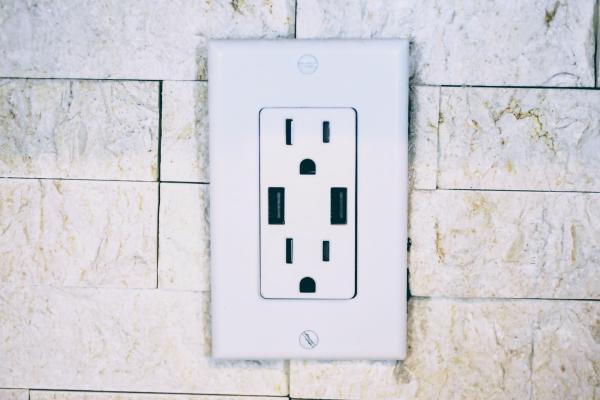
The outlet I have installed above is the Leviton 15A USB Wall Outlet. I like this one since it has 2 USB ports, supports the faster 15A charging, and comes at a great price. It also blends nicely into the decor without looking all weird and stuff like some of the other USB outlets do.


