


Lights On Patio: How to Illuminate Your Outdoor Space like a Pro Designer
DrawBuildPlay Join me in transforming your patio into a dazzling outdoor oasis. Discover trendy, practical lighting tips to create the perfect ambiance for your patio nights.Hey Patio Lovers!
Are you ready to elevate your patio game? Let’s talk about the one game-changer in any outdoor space - lights! Lighting isn’t just about seeing in the dark; it’s about mood, vibe, and that Instagram-worthy aesthetic.
Here’s your ultimate guide to getting those ’lights on patio’ goals!
1. String Lights: Your Go-To for Magical Vibes
String lights are the MVPs of patio lighting. Drape them overhead, wrap them around railings, or hang them in creative patterns. They’re perfect for adding a soft, dreamy glow to your evenings.
Pro tip: opt for LED string lights for longer life and better energy efficiency.
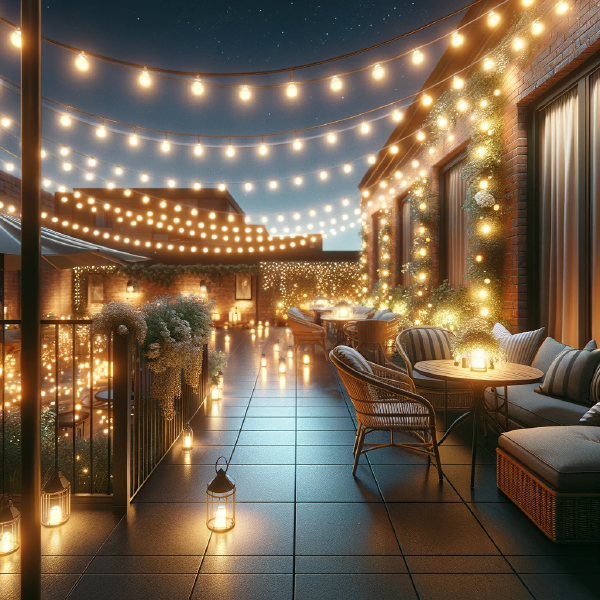
Outdoor String Patio Lights
2. Fairy Lights: Little Lights, Big Impact
Fairy lights are like the twinkling stars of your patio. They’re subtle, delicate, and oh-so-pretty. Weave them through your patio plants or in clear jars for a whimsical touch that’ll make your heart skip a beat.

Outdoor Fairy Patio Lights
3. Lanterns: The Classic Charm
Nothing says ‘chill vibes’ like a bunch of lanterns. Mix and match styles - from vintage to contemporary - and scatter them around your patio. They’re perfect for that soft, ambient glow that makes everything look better.
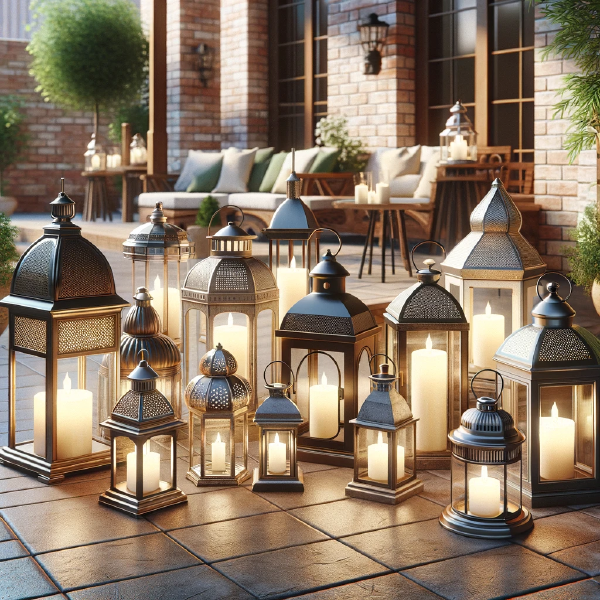
Outdoor Lantern Patio Lights
4. Solar-Powered Lights: Eco-Friendly and Effortless
Sustainability is key, folks! Solar-powered lights are your best friends if you’re into eco-friendly options. They charge during the day and light up your nights, saving energy and looking super sleek.

Outdoor Solar Patio Lights
5. Statement Lighting: Go Bold or Go Home
For those who love a bit of drama, a statement piece like an outdoor chandelier or a bold floor lamp can totally transform your patio. It’s a conversation starter and a showstopper – all in one.
6. Pathway Lights: Lead the Way in Style
Light up your patio pathways with some cool pathway lights. They’re not just functional; they add structure and design to your outdoor space. Choose designs that complement your patio theme.
7. Smart Lighting: Control with a Tap
Welcome to the future, where you can control your lights with your phone! Smart outdoor lights can change colors, adjust brightness, and even sync with your music. It’s the ultimate way to personalize your patio experience.
Your patio is your outdoor sanctuary, and the right lighting can make it magical. From string lights to smart solutions, there’s a whole world of options to explore. So, grab those lights, get creative, and watch your patio transform into the outdoor paradise of your dreams!
Remember to share your patio transformations with me, and let’s inspire each other with our fabulous lighting choices. Until next time, keep shining bright!
Here’s your guide to installing your own DIY outdoor patio lights using string lights:
As we gear up for the spring/summer season, I decided to add a touch of lighting to our outdoor patio/deck with some beautiful outdoor patio lights. These patio lighting are super simple to install.
One end of the lights were going to hang from the siding of the house, but I did not have anywhere to hang the other sides. So, off to Home Depot I go, and I bought some really cheap furring wood that matches the furring wood on my deck. These come in 8ft lengths, which is the perfect height I need. You can find them right at the back by the timber yard.
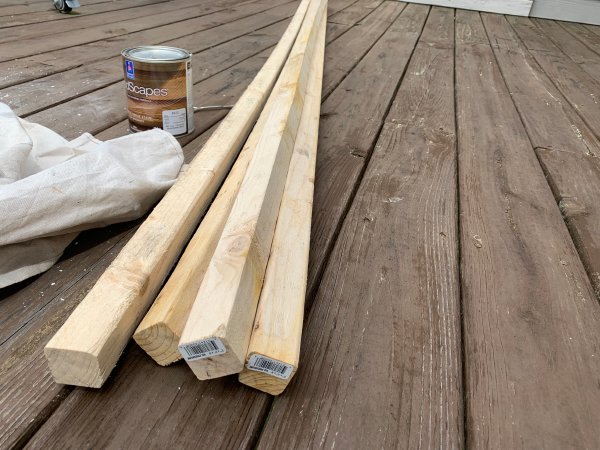
Furring Wood
Once I was home, I pulled out some left over stain I had from my DIY Herb Planter Box project, and gave the furring wood 3 coats of Sherwin Williams Hawthorne stain, so that it would match my deck stain. I wanted the posts to blend in with the deck.
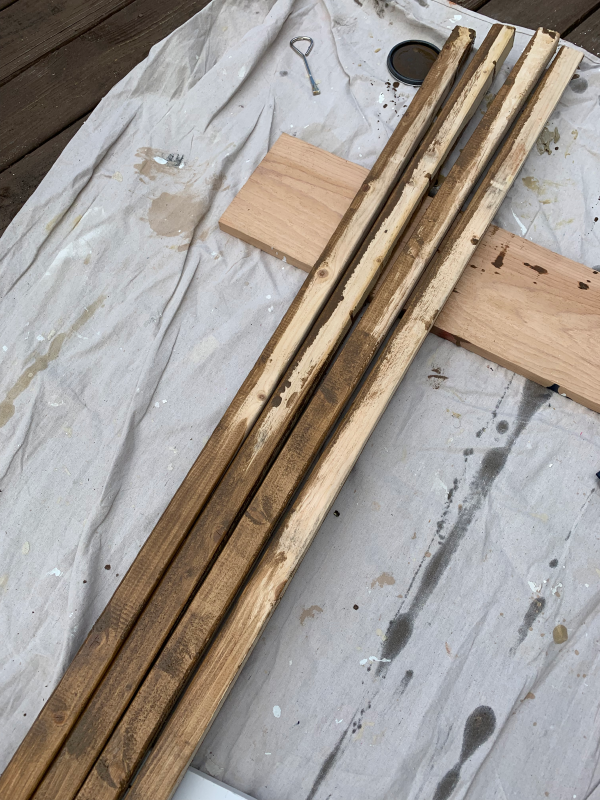
Staining the Posts
Let the posts dry.

Stained Posts
While staining these posts, I had a curious visitor from the gorgeous looking dragonfly.
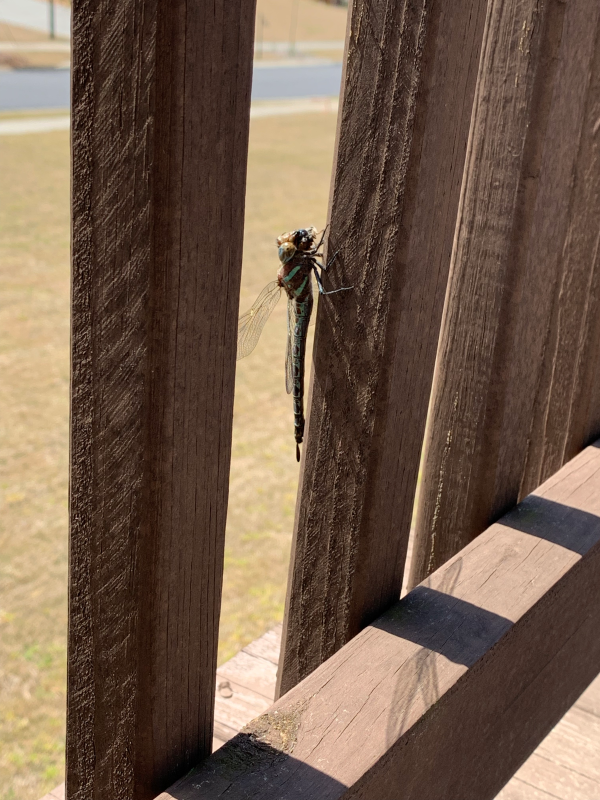
My Helper
Next, if you have hooks lying around, then great, otherwise you can buy some heavy duty hooks from Amazon to hold the outdoor patio lights. Drill a small pilot hole where you want to mount the hook. Then twist the hook into the hole. Repeat for as many posts as you need.
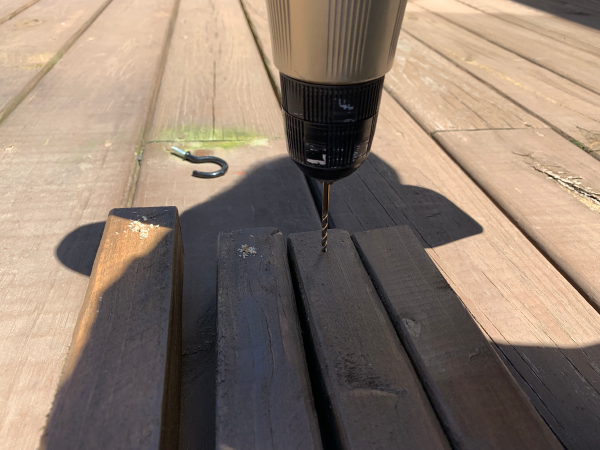
Drill Pilot Holes
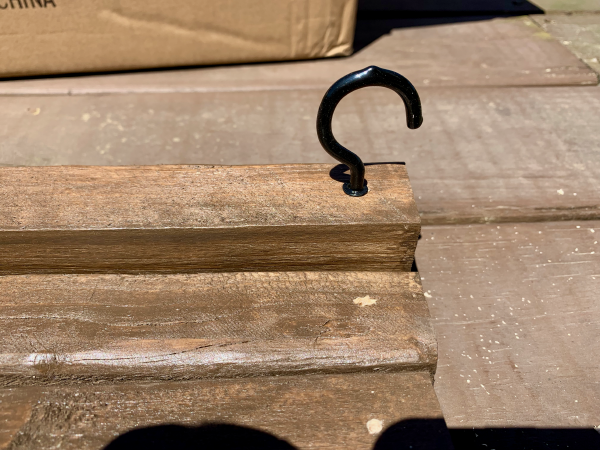
Post with Hook
The posts need to be mounted vertically against the deck railing. Many other blog posts try to mount these in cement or in pots. I just needed it to lean against the existing deck railing, so I bought these 36 inch heavy duty cable ties from Amazon instead. Use the cable ties to tie the post to the existing deck. Do this near the top and bottom so it has good support. Cable ties (zip ties) work best because they hold in place (ie don’t loosen over time), and you can tug on it to get it really nice and tight. My initial attempt I tried to tie it with some string, but you really cant get it to hold tight enough. The cable ties are black (also available in clear), so they hide pretty well. Just snip off the excess.
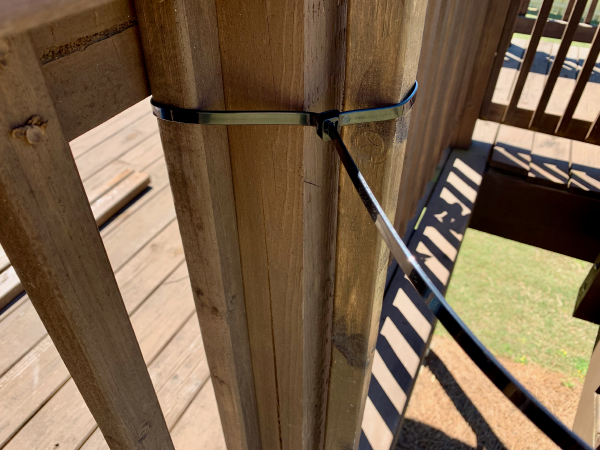
Tie with Cable Ties
Once you have all your posts mounted and tied to your deck, with the hooks facing your siding, you are ready for the next step.
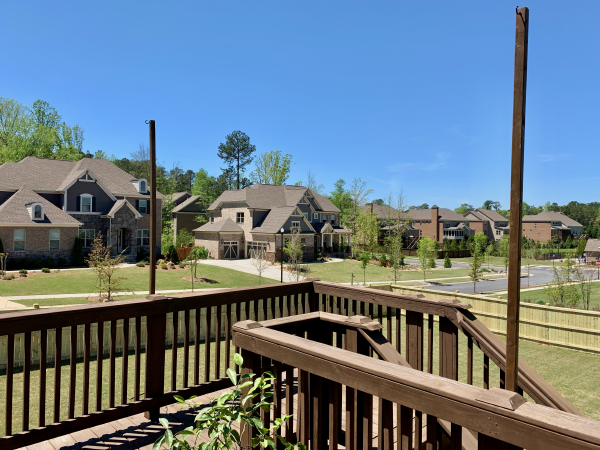
Mounted Posts
We need to have hooks on the wall. There are a few different options I considered here. One was to buy some gutter hooks which hang off the gutters. The second option was to use 3M outdoor command strips with light hooks (Amazon) which are designed for Christmas lights or other string lights. I went with the second option as it looks cleaner, and gets the lights right up to the wall.
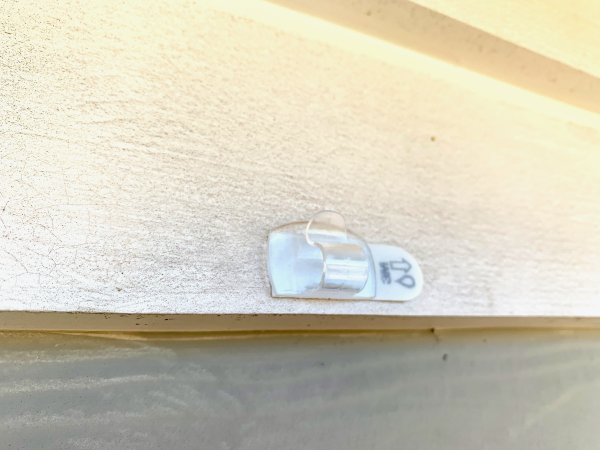
3M Outdoor Command Strips
Stick the Command Strip onto the wall first, and the plastic hooks onto each strip, and let it bond for about an hour. A good pattern to apply is to zig zag the lights, so place each Command Strip in the space parallel, but in between your posts.
Once the Command Strips have bonded, it’s time to mount your string lights. We used these gorgeous and super affordable Outdoor Patio Globe String Lights from Amazon. You get 100 globe lights in the pack which was perfect for the length we needed. Start stringing your outdoor patio lights, starting where it will be plugged in (eg outdoor outlet), and going to your first hook. From there, string it along to the first post with a hook, then back to the wall, and so on, following a zig zag pattern. You will want a minor swag in the line so that it has tolerance with heat changes and wind. Otherwise it might pull off one of the hooks if things get tight with temperature variations.

Hooked Outdoor Patio Lights
If by the time you get to your last hook, you still have wire left over, then bundle it together with a tie, and find a place to hide it. You can hide it around a corner, behind a gutter, or even throw the excess onto the roof where it’s not so obvious.
The final step is to start screwing in each bulb. Starting from the start, plug in each bulb. I had the wire connected while doing this so that I could ensure each bulb lit up as I installed it. These bulbs don’t really get that hot, so I didn’t feel any risk of burning myself.
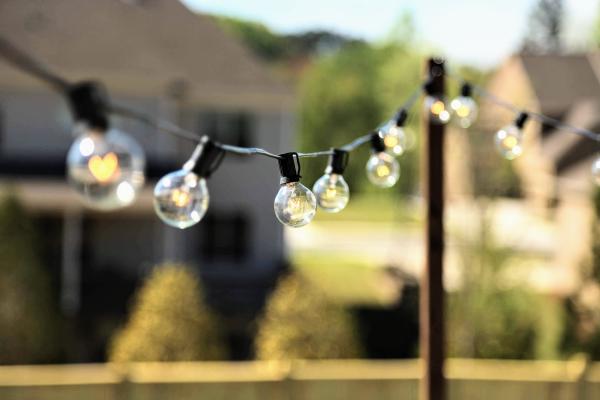
Outdoor Patio Lights
This is the final look of the outdoor patio lighting. It looks so cool, and I am looking forward to spending time on my outdoor patio this summer with friends and family, while drinking those Moscow Mules.


