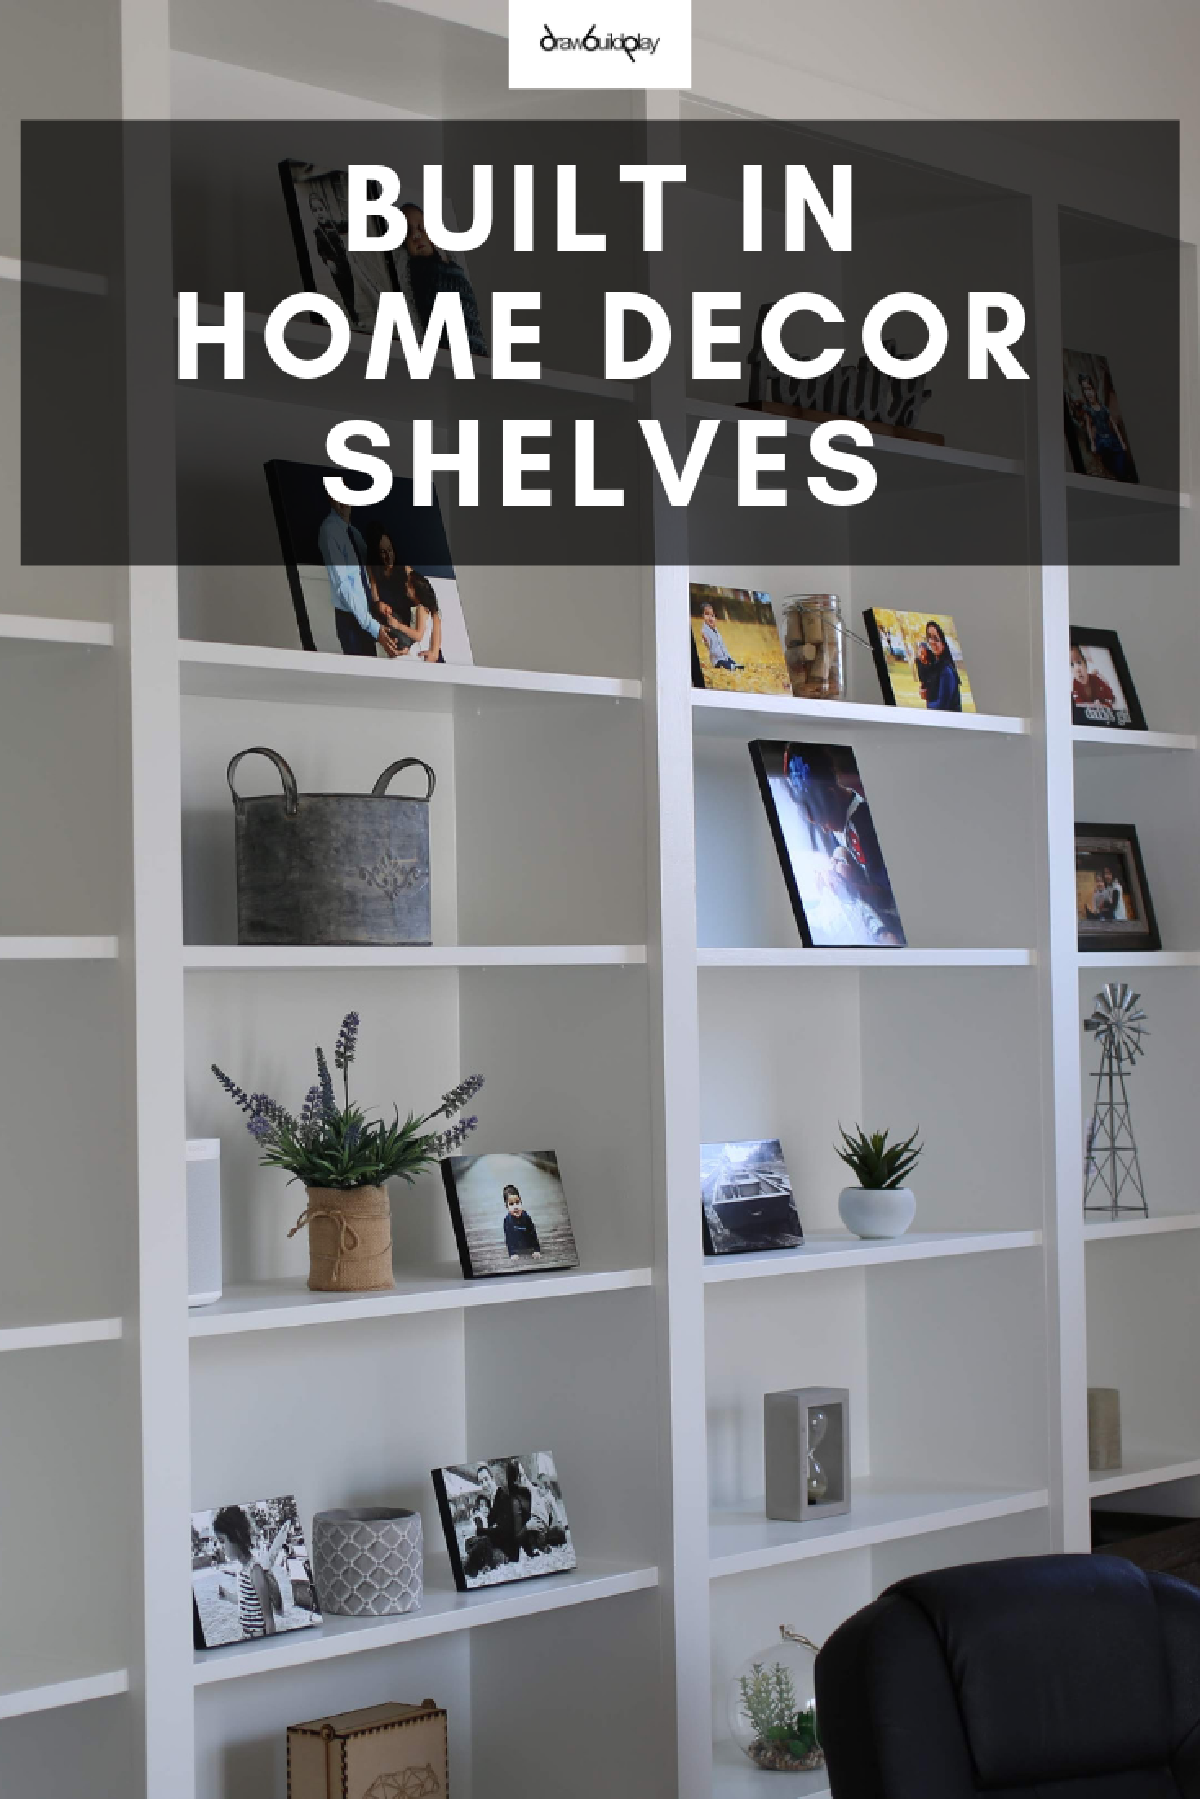
DIY Built-In Shelves using Ikea Billy Bookcase Hack
DrawBuildPlay Discover how to transform your home office with our DIY guide to creating stylish built-in bookshelves and a desk using the IKEA Billy bookcase hack. Ideal for adding functionality and chic design to any space.Hey there, DIY enthusiasts and style mavens! Are you ready to dive into a super cool project that’ll totally up your home office game? I’m about to spill the beans on my latest obsession: creating an uber-chic and totally functional workspace by blending a sleek desk with some seriously stylish built-in bookshelves – all using the IKEA Billy bookcase hack! Trust me, it’s easier than it sounds and way more fun.
I’m all about finding savvy ways to create spaces that are not just Insta-worthy, but also super practical for our busy lives. Whether you’re juggling Zoom calls, hustling on your start-up, or just want a pretty backdrop for your daily TikToks (guilty!), this project is going to be a game-changer. So, grab your lattes and let’s transform your workspace from ‘meh’ to ‘wow’! Because let’s face it, a plain wall just doesn’t cut it anymore. Let’s do this!
Planning and Design
Alright, let’s get into the nitty-gritty of turning our vision into reality! Planning is key, and it’s all about finding the perfect spot in your home where functionality meets flair. Whether it’s a cozy corner in your bedroom or that underutilized space in your living room, choosing the right spot is essential. For me, it was all about creating a statement piece in my home office that could double as a stunning background for my virtual meetups.
Once you’ve picked your spot, it’s time to talk design. The beauty of the IKEA Billy bookcase hack is its versatility – it’s like a blank canvas waiting for your personal touch. Think about how you work and what you need within arm’s reach. Need lots of storage for your books and decor? We’ve got shelves for that. A spacious desk area for your laptop and those cute stationery items you can’t live without? Absolutely.
Now, let’s sketch it out! I’m talking about some old-school paper and pencil action. Measure your space, and plan how your bookcases will flank your desk area. Remember, this is your creative masterpiece – it should reflect your style and needs. Are we going for a minimalist vibe or a more eclectic look? This is your chance to infuse your personality into every shelf and nook.
Pro tip: Consider the lighting in your chosen spot. Good lighting is not just vital for work but also makes your Instagram stories pop!
In this phase, feel free to play around with ideas, and don’t be afraid to get a little wild with your designs. After all, the best part about DIY is making something uniquely you!
Materials and Tools Needed
Okay, DIY squad, it’s shopping time (my favorite part)! To kickstart our built-in bookshelf and desk project, we need to gather all our materials and tools. Here’s a rundown of what you’ll need to create that chic, functional workspace:
Materials:
- IKEA Billy Bookcases: The star of our project. Depending on your space, you might need two or more.
- Desk Surface: You can choose a pre-made desk top or get creative with a custom piece – think reclaimed wood for a rustic touch!
- Primer and Paint: We want our shelves and desk to scream ‘chic,’ so pick a color that vibes with your room. I’m all about that crisp, high-gloss white.
- Caulk and Sandpaper: For those professional, seamless finishes.
- Additional Shelving or Wood Panels: Depending on your design, you might want some extra shelves or panels for customization.
Tools:
- Measuring Tape and Level: Precision is key, lovelies!
- Drill and Screws: For securing those bookcases and creating your desk setup.
- Saw: If you’re cutting any wood or making adjustments.
- Paintbrushes and Rollers: For that flawless paint job.
- Safety Gear: Don’t forget your goggles and gloves. Safety first!
Pro tip: Always double-check your measurements before cutting or drilling. It’s all about that perfect fit!
Gather these essentials, and you’ll be all set to start building your dream workspace. Remember, the goal is to create a space that not only serves your needs but also reflects your personal style. So, feel free to get a little creative with your choices!
Step-by-Step Building Process
Get ready to roll up your sleeves, because it’s time to start building! Here’s a step-by-step guide to create your stunning built-in bookshelves with an integrated desk. Remember, it’s all about adding your personal flair to it!
Well, this is what the library looked like originally.
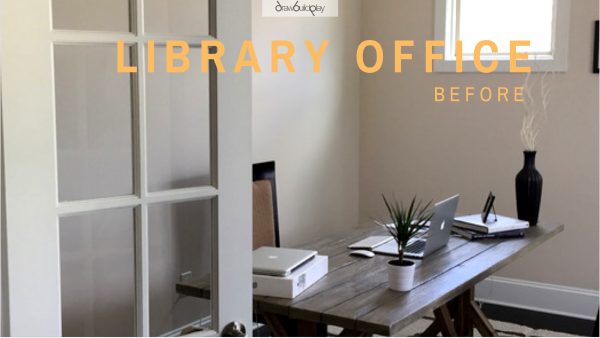
Home Office Before Shelving Added
-
Assemble the IKEA Billy Bookcases: Start by assembling your Billy bookcases according to IKEA’s instructions. It’s super easy – like giant Lego for adults!
-
Preparing the Base: If you have large baseboards like I did, you might need to elevate the bookcases. I built a simple base frame with 1x3 wood and topped it with plywood. Ensure it’s level because nobody likes a wonky shelf!
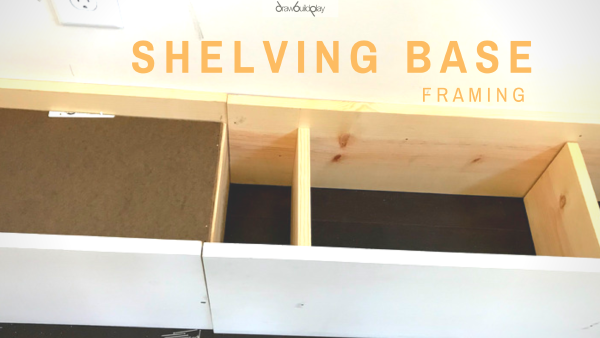
Home Office Shelving Base
- Place and Secure the Bookcases: Lift each bookcase onto the base. Space them evenly and once you’re happy with the arrangement, use the provided IKEA mounts to secure them to the wall studs. Stability is key!

Ikea Billy Bookshelf Hack
-
Adding the Desk: For the desk, fit your chosen surface between two bookcases. If you’re using a pre-made top, secure it with brackets. If it’s custom, you might need to get creative with your attachments. Ensure it’s sturdy – we don’t want any coffee spills! I chose to keep my desk seperate and use the shelves as a backdrop.
-
Customization and Trim Work: Now, customize! Fill any gaps between the shelves or between the shelves and the wall. Add trim or molding for a built-in, seamless look. This is where your bookshelf goes from IKEA to high-end custom!
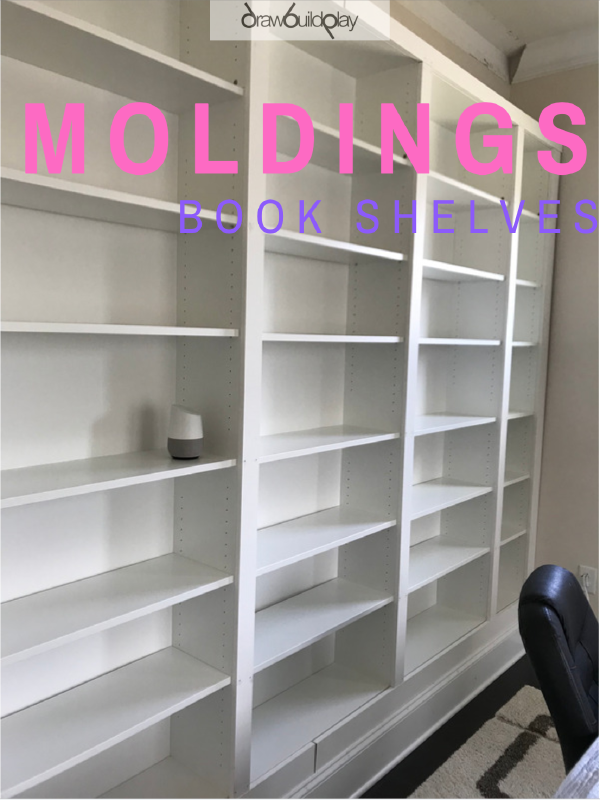
DIY Book Shelf Molding and Trim
-
Sanding and Priming: IKEA furniture finishes can be tricky to paint. So, sand down the surfaces lightly and apply a good primer. This step makes a huge difference.
-
Painting: Once primed, paint your bookshelves and desk in the color of your choice. I went for a glossy white for a fresh, modern look.
-
Final Touches: Reattach any baseboards, add decorative elements, and maybe some cute lighting. This is where your personality shines!
And voilà! You now have a stunning, functional workspace that’s sure to be the envy of all your Zoom buddies.
Finishing Touches and Decoration
Now that the major construction work is done, it’s time to bring in some personality and style – my absolute favorite part! Here’s how you can add those finishing touches and decorations to make your built-in bookshelves and desk not just a piece of furniture, but a reflection of you.
-
Sanding and Priming (Again): I know, I know, it seems like we just did this, but trust me, a second round of light sanding and priming can really make your paint job last longer and look more professional.
-
Painting – Make It Pop: Choose a color that complements your room. I chose a high-gloss white for a clean, modern look, but feel free to get creative! Maybe a pop of color or a soothing pastel?
-
Caulking for a Seamless Look: Caulk is your best friend for achieving that built-in, seamless look. Fill in any gaps between the shelves, the walls, and the trim. This step truly elevates the whole project.
-
Adding Your Personal Touch: Now for the really fun part – decorating! Arrange your favorite books, add some chic decorative items, maybe a few plants for a fresh vibe. Remember, this space should inspire you, so fill it with things that spark joy.
-
Setting Up Your Desk: Your desk isn’t just for work; it’s a part of your home. Style it with functional yet aesthetic items – a stylish lamp, a cute mug for your pens, and don’t forget a comfortable chair that complements the whole look.
-
Lighting: Good lighting is crucial. Add a desk lamp for task lighting and maybe some LED strips on the shelves for an extra cozy ambiance.
-
Final Look: Step back and admire your work. You’ve transformed a simple bookshelf into a stunning, functional workspace that’s uniquely yours. Snap some pics, share your creation with the world, and bask in the glory of your DIY skills!
Final Reveal and Benefits
Drumroll, please! It’s time for the big reveal. After all the measuring, cutting, painting, and decorating, your DIY built-in bookshelves and desk are ready to shine. But it’s more than just a visual transformation; let’s talk about the incredible benefits of this project.
-
Aesthetic Appeal: Firstly, let’s appreciate the sheer beauty of what you’ve created. The bookshelves aren’t just furniture; it’s a statement piece that elevates the entire look of your home office. It’s chic, it’s modern, and it totally reflects your personal style.
-
Improved Functionality: This setup isn’t just about looks; it’s super functional too. The ample shelving provides plenty of space for all your books, work materials, and decorative items, while the desk offers a comfortable and spacious area for you to work, create, and innovate.
-
Space Optimization: Especially for those living in smaller spaces, this project is a game-changer. By combining storage and a workspace in one, you’re maximizing your space efficiency without sacrificing style or comfort.
-
Increased Productivity: A well-organized, aesthetically pleasing workspace can do wonders for your productivity. It’s inspiring to work in a space that you’ve personally designed and built. Plus, everything you need is within reach!
-
Personal Satisfaction: Lastly, the sense of achievement you get from completing a project like this is unmatched. Every time you step into your home office, you’ll be reminded of your creativity, skills, and the effort you put into making your vision a reality.