


Laundry Room Makeover
DrawBuildPlay DIY Rustic Laundry Room Makeover, with Wooden Countertops and Bead Board walls. This elegant laundry room will make laundry a pleasure. Start this easy DIY laundry room remodel today.Hi DIYers. Welcome to my latest post on DIY projects. This is one of the first projects I ever completed at home and inspired me to do many more since then. Our home came equipped with two locations for the laundry room. The standard one was downstairs behind the kitchen in what I consider to be a massively oversized room for a laundry. But, we also asked the builder to equip one of the closets upstairs to be a laundry room, which he happily obliged. We wanted our laundry to be upstairs, and the smaller closet location really made a lot of sense to us, since we dont really get the need for having oversized laundry rooms. This also gave us the added benefit of having a hidden laundry room, hiding in an upstairs closet.
I will post later on what we did in what was supposed to be the downstairs laundry.
Here is what the laundry room looked like before the remodel:
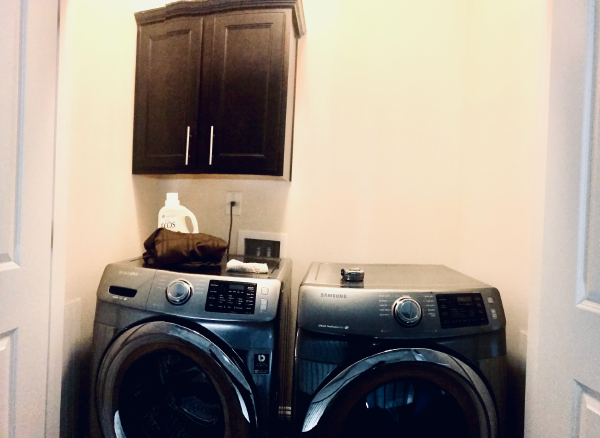
Laundry Room Before the Makeover
It was pretty bland. We had just purchased a new front loader washer and dryer, but we weren’t happy with the look of the room. It just didn’t do justice to the new gear in the room. After being inspired by various other laundry remodels on Pinterest, we took the step to makeover our laundry room.
I started off with getting these really nice and inexpensive wood panels from Home Depot. I covered the back and side walls with the panels to give it a nice depth and warmth. Trim was added to help with the transition since I didn’t want it to cover the entire side walls. To attach these to the wall, the easiest thing to do is use Liquid Nails. Stick it on the wall, then add a few molding nails along the studs so that it stays secure.
Once the wood panels were attached and secured (wait a few hours for the liquid nails to really dry), I painted the walls. I wanted contrast between the back wall and the side panels. The back wall panels are painted in Sherwin Williams - Repose Gray. The side wood panels are Glossy White. The side walls where the panels were not applied are again the Repose Gray.
Next up was to put in a DIY counter top. We wanted the wood to appear weathered. This is actually surprisingly simple to DIY.
- Buy some wood from Home Depot. We used the 12" deep boards (2" thick) and cut them down to width needed. One of the boards was only 8" deep so that the counter would fit in the space when laid out next to each other.
- After it has been laid out and you have dry fit it in the laundry, you get to have some fun and give it the weathered look. Start by sanding it down with your mouse sander to get rid of any rough patches. Sand down the edges so they too look a bit warn out and aren’t so sharp.
- Next, apply some white wash to the wood. Take some white paint in a plastic container, and dilute it with half water / half paint. Then grab a cloth and rub it into the wood. You don’t need to paint the whole thing, just get some streaks along it. If you want other shades to pop through, then this is the time to apply those color(s) too, using the washed out method. Hints of blue can work well here. Let it dry.
- Grab the stain (we used a dark walnut stain) and apply the stain to the wood. You will want to get good coverage with this stain.
- Once applied, and it is dry, grab the sander again, and sand down the wood. This will give the aged look where the white and colored paint start to edge through. If you want a beaten up look, start going to town with a hammer, or hit the wood with chains, or really anything you can find that can make some dents in it. Or leave the wood looking pristine. Its your choice.
- Since this is a laundry room where liquids will be present, we opted to apply a water sealant to the wood. Note - this will give the wood some gloss, but will also protect it from water spills, wet laundry, and detergent spills.
To mount the counter, I installed some 2x2 wood (cut down to size) against the two side walls. (Note I also stained the 2x2 but you can skip this step since it will be unseen once installed). Using long stud screws, and a power drill, you want to make sure you get the 2x2 mounted against the wall. Make sure the screws go through where the studs are as these 2x2’s will be responsible for holding up the counter tops. Make sure both sides are mounted at the same height and are level, and the top of the 2x2 clears where the top of your washer/dryer will be. I left a 1" gap between the top of the bracket and the dryer to allow for vibration/movement when the washer/dryer are running.
Once installed, simply place the weathered boards on top. Enjoy =)
And now for the big reveal!

Laundry Room Makeover
The laundry room is not fully complete yet (are any of our projects truly ever complete?). Next we will be adding a shelf next to the cupboard there, which I plan to do as one of my upcoming projects (stay tuned). Probably a floating shelf or maybe pipes holding the shelf up. Stay tuned for that update. Also need to get some farmhouse signage that would look great in here.
I am also contemplating the idea of if we should keep our laundry room hidden. An option I am thinking about is replacing the doors with a farmhouse look with an opaque glass panel with lettering on it. Not sure yet, since I also like how the laundry room is currently hidden.


