


Transform Your Space with Our DIY Herb Garden Planter Box: Unleash Freshness and Beauty Today!
DrawBuildPlay Its finally Spring, and that means it's time to get planting outside. This DIY Herb Garden Planter Box is perfect for hanging over your Deck rails to grow your herbs, or as a DIY vegetable planter box.Hey there, fellow plant enthusiasts! 🌱 As the temperatures start to warm up, it’s time to start thinking about the growing season. We love to cook at our home, and a fresh batch of herbs on hand is always a life saver. Not to mention we love the smell of fresh herbs around us.
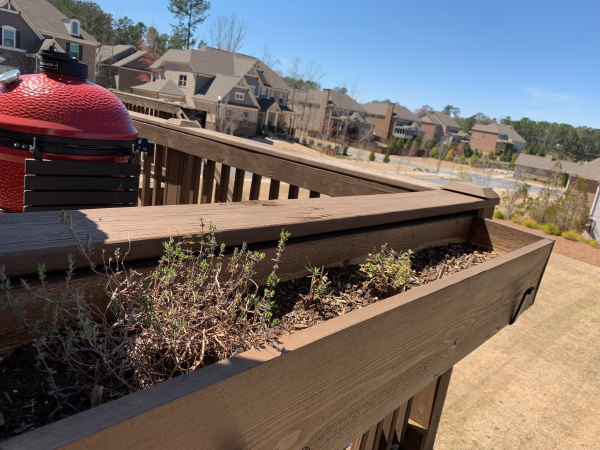
If you’re like us and crave the convenience of having herbs right at your fingertips for your culinary adventures, then you’re in for a treat. We wanted to have something close to the kitchen so that we could walk out and grab a handful of Thyme or Rosemary whenever we needed. Ideally ours would have been against a window sill, but our kitchen isn’t ideally situated for that. So instead, we decided to hang a long planter box over our deck railing. If you have a window sill, you can just as easily hang this design from there too.
What’s a DIY Herb Garden Planter Box?
A DIY herb garden planter box is exactly what it sounds like – a charming box that houses a mini herb garden. It’s like having your own little oasis of freshness right in your home. But it’s not just about convenience; it’s also about the aesthetic appeal. These planter boxes can turn any corner of your home into a lush, green paradise.
This cedar planter box was super easy to build. I used cedar for the box since my research showed it was one of the best options for outside weather conditions. Plus I love the look and smell of cedar (yeah I may be weird).
I also stained my planter box using Sherwin Williams SW3518 Hawthorne, which is the same color as our deck stain. If hanging from a window, you may prefer to paint it white or give it a white washed stain for a more farmhouse vibe.
Materials and Tools
For this project, you will need to decide how long you want your planter box to be. Ours is pretty long, but I wanted it to be the same length as our deck rail on that edge. Your’s will probably be shorter. My planter box ended up being 50" long, 9" wide, and 7" high. I purchased cedar which was 7" x 3/4 inches, and then cut it to three lengths of 7" x 50" (bottom, front, and back), and two lengths of 7" x 9" (two ends).
Place the cedar pieces against each other to make your box and make sure it looks square. If all looks good, then mark some pilot holes where you will be screwing the wood together. Drill the pilot holes, as this will make it easier to screw the screws in. You can also use some glue to help hold it together while you screw in the screws.
Planter Box
Step-by-Step Instructions
Now, let’s dive into building your DIY herb garden planter box! Here’s a step-by-step guide:
Step 1: Choose Your Location
Decide where you want to place your planter box. It could be a sunny windowsill, a cozy corner, or even a spot in your kitchen. Make sure it gets enough sunlight.
Step 2: Add Drainage
Drainage is key to keeping your herbs healthy. Drill some holes in the bottom of your planter box to allow excess water to escape.
Step 3: Fill with Potting Mix
Pour in your potting mix. Leave some space at the top for your herbs.
Step 4: Plant Your Herbs
Dig small holes in the soil and plant your herb seeds or starter plants. Remember to follow the spacing recommendations on the seed packet or plant label.
Step 5: Water and Care
Give your herbs a good drink and place your planter box in a sunny spot. Water when the top inch of soil feels dry. Trim and harvest your herbs regularly to encourage growth.
On the bottom of the planter box, drill 3 to 4 holes (about 1/4 - 1/2 inch). This will be to allow water to drain easily. Again, sand any splinters that are showing.
In a well-ventilated area, now apply your stain. Do as many layers as you feel are necessary to get the color you desire. I did two coats for mine. I also did not stain the area where the soil will go because I didn’t want the stain chemicals seeping into the herbs (probably wouldn’t, but I’m paranoid). So basically, stain the outsides and bottom, and the top few inches of the inside. You can also apply a water-proof sealer at this time to help protect the cedar from the rain.
Once dry, it’s time to mount the planter box at your location. I found this excellent Window Hanging Bracket on Amazon which holds this box, and stays relatively hidden by screwing into the deck rails behind where the box will sit.
Once you have mounted the brackets on your deck railing, hang your planter box on it. Place some small rocks around the 1/2 inch holes you drilled at the bottom. This will help water drain through but stop the soil from falling through. Then fill up your box with your preferred soil and fertilizer products.
Now for the best part. Plant your herbs and water well.
DIY Herb Garden Planter Box
Choosing the Right Herbs
When it comes to herbs, the sky’s the limit! Choose ones you love to cook with or herbs that make your space smell heavenly. Basil, thyme, and oregano are great choices for beginners.
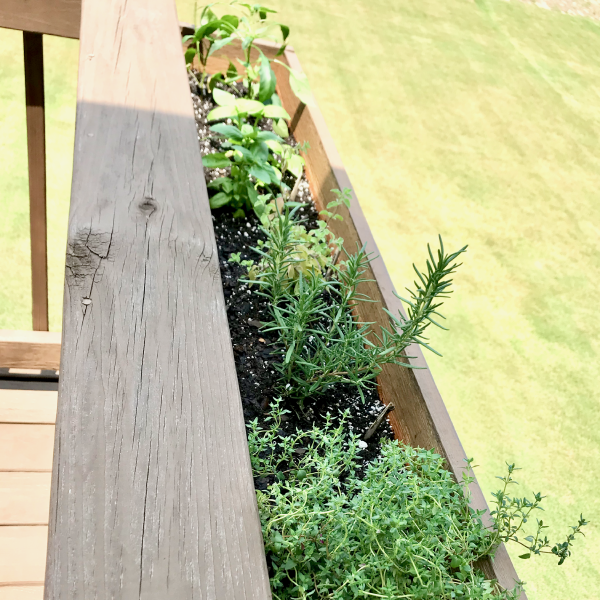
Pictured above, we planted (starting from the left):
- Chili Plant
- Basil
- Oregano
- Rosemary
- Thyme
I think we will drop the Chili Plant and maybe add Parsley instead. I want to do mint but that will need to be in its own container since it spreads and takes over so much. It is currently late March, and I think the last frost of the year has passed, so that makes now a perfect time to get that herb garden prepared for spring and summer.
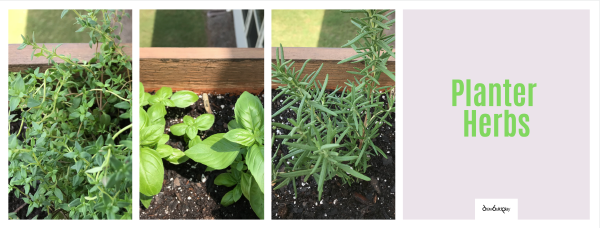
Planter Herbs
Caring for Your Herb Garden
Maintaining your herb garden planter box is a breeze. Water regularly, trim the herbs to keep them bushy, and watch them flourish. You’ll have fresh herbs at your disposal for all your culinary creations!
Benefits of a DIY Herb Garden Planter Box
The perks are endless:
- Fresh herbs for your cooking adventures.
- Aesthetic appeal – a touch of greenery is always stylish.
- Easy access to herbs right in your home.
- It’s a fantastic DIY project!
Additional Tips and Ideas
- Personalize your planter box with a coat of paint or unique decorations.
- Try companion plants like marigolds to keep pests away.
- Consider themed herb gardens, like an Italian herb garden with basil, rosemary, and oregano.
Conclusion
And there you have it! Your very own DIY herb garden planter box awaits. With a bit of creativity and care, you’ll enjoy fresh herbs and a delightful addition to your home decor. So, what are you waiting for? Get planting, and let’s transform your space into a green haven of freshness and beauty! 🌿✨
Note: Don’t forget to share your herb garden adventures with us on social media – we’d love to see your creations!


