


DIY Drawer Organizer
DrawBuildPlay Do this easy DIY Drawer Organizer for your kitchen utensils, or really any drawer organization you want. Total cost of materials was less than $11.This DIY Drawer Organizer was a spur of the moment DIY I came up with. We used to have a store bought wooden organizer a while ago which looked nice, but it wasn’t sized appropriately for the drawer, and the slats had gaps below them where the silverware would sneak under (this was really annoying). Then recently, I went out and replaced it with a new organizer, but it was even smaller and just didn’t look good.
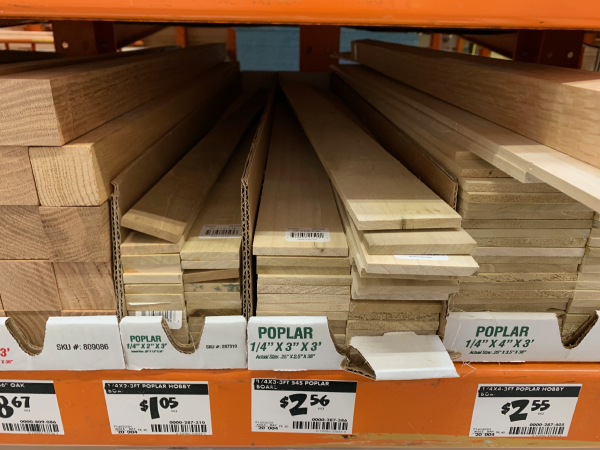
So, this morning I decided to go out to my local hardware store, and bought 4 pieces of poplar wood (1/4" x 3" x 3ft) for just $2.56 each (total $10.24 + tax). You might want to buy a few extra pieces as spare in case you cut one too short by mistake, or decide to add more compartments.
Poplar Wood for Drawer Organizer
I came back home, and pulled out the existing drawer. I measured each side and cut the poplar wood as needed, one at a time. Basically, measure, cut, dry place, repeat. I ended up with a pieces to make up the sides of the box, and then the pieces for each of the compartments.
Here’s my sketch of what I was aiming for:
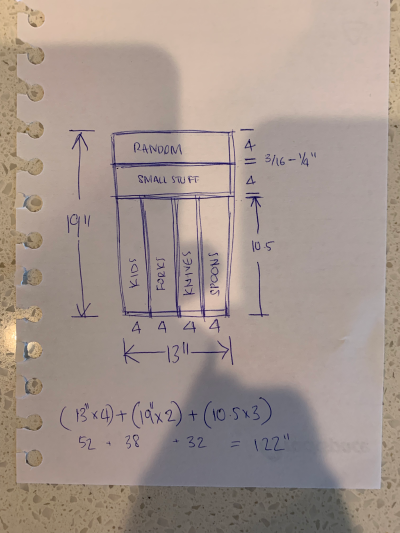
Sketch of DIY Drawer Organizer Compartments
You will need to measure the sides and compartments based on your own drawer, and how you want your silverware utensils arranged.
Once you have all your pieces, and they fit together nicely in your drawer (make sure its nice and snug, but also not flexing the wood), then the next step is to start glueing.
I don’t have clamps, so glueing is a really slow process for me. I started with each side, and let it dry/set for 30 minutes before glueing another piece. When I try to glue multiple pieces at once, theres too much wobble and the pieces just collapse since they haven’t had time to stabilize and bond. Also, ensure each side is square.
Glue the DIY Drawer Organizer, with ends squared.
Once you have the outer box created, make sure it still fits how you want it in your drawer.
If all is good, then time to glue in the inner compartments. Start with the slats for the forks and knives and spoons, keeping everything square. Once those are set, you can glue in the other compartments towards the back. This ensures that the spacing is even between compartments as you put them together.
Another thing that helps with getting joints glued nice and tight is to put a heavy weight on them (if you dont have the clamps). A small cast iron pan does wonders here lol.
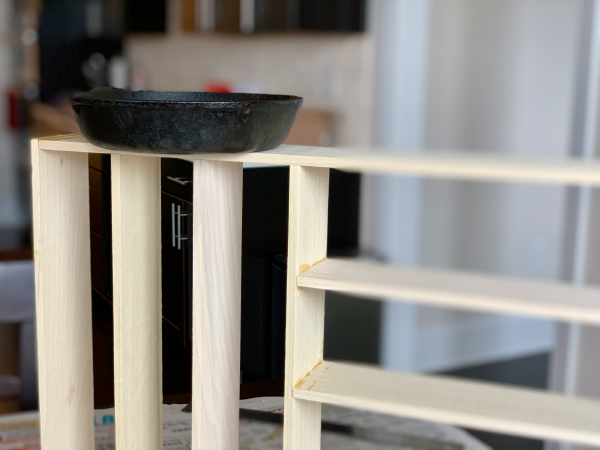
Glue your organizer compartments so they hold nice and tight.
And….here is the final product.
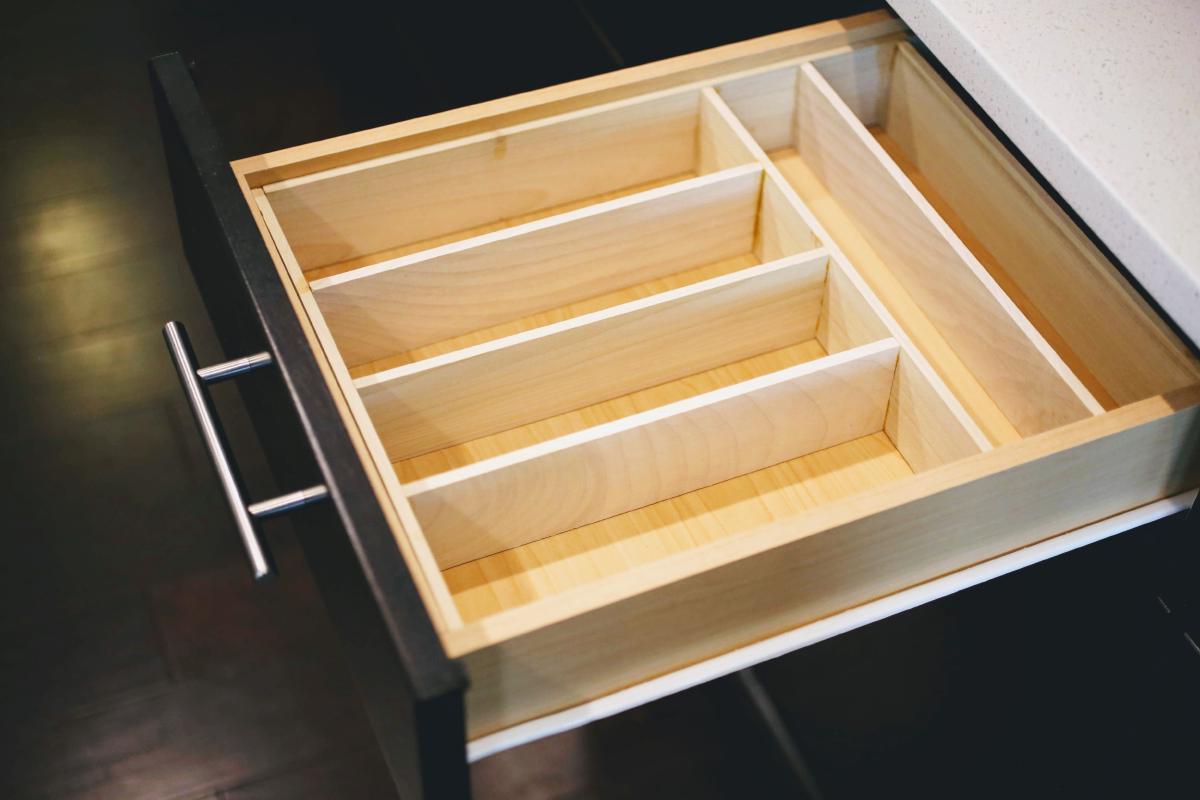
Utensil Drawer Organization DIY
We love how our DIY silverware drawer organizer turned out.


